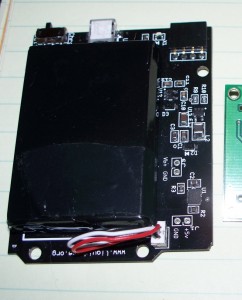
The Lithium Backpack from Liquidware is a pretty straight forward affair. It has outputs for +3.3, +5, and ground, along with a status pin. I added three more wires to the “shield” that I created for the LCD. This brought the +5 and ground pins from the backpack, to the corresponding pins on the Arduino, and connected the status pin to an analog pin. At this point I could add the % of battery left to the LCD, but left the work of getting accurate data for later on, and just used the analog value, since I had some data flowing, and wanted to work on the menu system.
The only issue with the backpack (that probably only pertains to the extended model with its’ tall battery) is that the pins on the reset button were pressing against the top of the battery, and tore into its’ protective cover within a couple of days. A third standoff in the kit would solve the problem. I submitted this suggestion on the liquidware site, and got a prompt response, so here’s hoping that they’ll add another one for future orders.
On to buttons:
I wired up two buttons on the breadboard, and stole two pins from the GPS Logger shield (since I had the LCD menu, I had removed the code that used LEDs to display fix and SD card write status, so these pins were free).
I worked through a couple of different libraries, and samples for switch code, before deciding to use Jeff Saltzman’s press and hold sample code.
In order to conserve battery life, I implemented a routine to turn the backlight on the LCD off after 30 seconds. On the first button press (either button) the app checks for the backlight, if not on, then it turns it on and ignores the rest of the button check routine.
The menu system is based on two buttons controlling 4 menus.A single press of button 1 engages a “tagging” menu. Once this menu is engaged, button two is used to scroll down through the list of options (in a loop). Pressing button 1 again writes the selected tag (waypoint) to the file on the SD card. Pressing and holding button one brings up a “mode” selection menu. Again button two is used to cycle through the menu options, and pressing button one again exits the menu, applying the selected mode. Modes will be used to turn features on and off to save power when not using a feature. Button two is used to toggle between longitude / latitude display, and advanced information display screens. The press and hold on button two will have an additional menu added to it, but I’m not sure what at this point.
Next I’ll outline extending the output from the GPS (and parsing / displaying the data), and getting the battery monitor code cleaned up.

